
Your Goplus welder has arrived. You opened the box filled with excitement. But wait.
What is this flimsy bit of paper that is in the box.
Is that supposed to be your Goplus MIG 130 welder manual?
Isn’t there something better to help you get started?
The Goplus MIG 130 Manual
I’ve seen the Goplus MIG welder manual described as a waste of paper.
And it pretty much is.
Once you have seen it you know you’re going to need some help.
You’re here because you are looking for something better. And in this article you’ll find some supportive advice.
Connecting Your Goplus MIG 130 To Power
The Goplus welder comes with a 3 pin plug. You will need to insert that plug into a grounded and fused power outlet. As a 110 volt welder you will the Goplus MIG 130 connected onto a 20 Amp fused circuit.
Choosing a lower 15 Amp circuit means that you risk blowing your fuse as soon as you start welding at a high output level. And you’ll find that annoying real quick.
And you’ll find its best to unplug any other appliances you have on the same circuit that draw electricity. As even a little extra draw on that electricity will take away the power the Goplus welder needs to weld.
Installing Welding Wire Inside The Goplus Welder
Once you have unboxed the Goplus MIG 130 installing the welding wire is one of the first things you’re going to need to do.
The Goplus is a flux core only welder and you get a sample spool of mild steel flux core wire in the box. It’s not particularly good quality but until you get yourself some proper wire, it will do.
Before you start, turn off the power and unplug your Goplus welder. Please do this before you touch anything inside its cabinet.
1. Take Your Spool Of Flux Core Welding Wire.
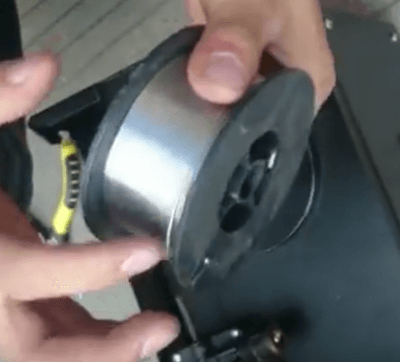
Take a note of where the flux core welding wire attaches to the spool. The wire is under tension and notched onto the spool. Don’t free the wire from the notch yet. Leave it as it is for now.
But you do want the notch on top.
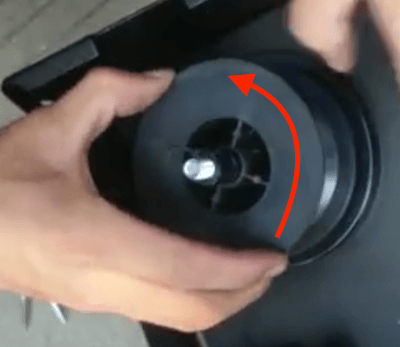
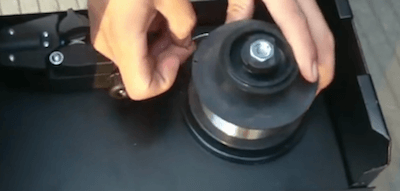
2. Place The Spool On The Spindle.
You’ll want to place the spool on the spindle so that the wire winds anti-clockwise. You want the wire coming off the spool toward the drive roll.
3. Put The Large Nut Onto The Spindle, On Top Of The Spool.
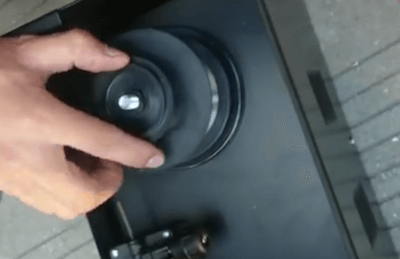
4. Next, Put The Tensioning Spring Onto The spindle On Top Of The Large Nut.
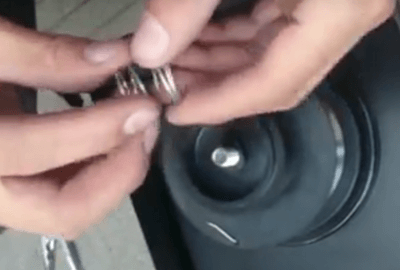
5. Then The Smaller Tension Nut Goes On.
Hand tighten so that the spool of flux core wire is under some tension. You want the spool to turn but not so that the spool is too loose.
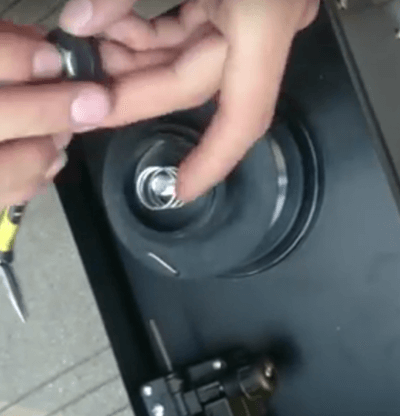
6. Un-notching The Flux Core Welding Wire.
Place your hand on the spool of wire so that the welding wire doesn’t suddenly unravel.
You’ll be in a world of pain if that happens. Now you are ready to free the flux core wire from the notch.
Wind out about 6 to 8 inches of the wire and straighten. With a pair of welding pliers cut off the kinked end.
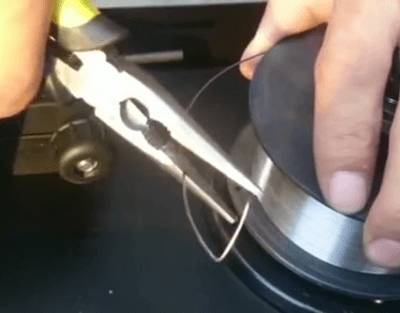
Keep your other hand on the spool of wire to prevent the wire from unspooling.
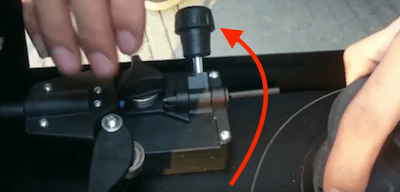
7. Rotate The Tension Up And Over.
8. Then Feed The Welding Wire Into The Wire Guide.
Feed the wire through while keeping the welding wire tensioned on the spool with your hand.
9. Guide The Welding Wire Into The Incoming Wire Guide And Over The Drive Roller Into The Groove.

Then a few inches into the outgoing wire guide.
10. Rotate The Pivot Arm Back And Tighten To Tension.
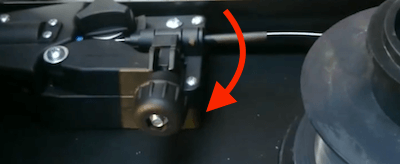
You’ll want to tighten the knob on the pivot arm with enough a tension to hold the wire.
You want sufficient tension without crushing the delicate flux core wire. And you want to see the wire in a nice line from the spool through to the drive roller with no sagging wire.
Now you have loaded up your welding wire. Close up the Goplus MIG welder’s cabinet.
Feeding The welding Wire To The MIG Gun
When you have loaded up your welding wire. You’ll be ready to feed the wire up to your welding torch. Before you do that, be sure the power is off.
1. Remove The nozzle.
Then take a set of welding pliers and unscrew the contact tip.
Lay both to one side.
2. Straighten Out The Hose To The Welding Torch.
Hold the torch if you can or lay it somewhere away from anything metal that it could arc to.
Lay the hose out as flat and as straight as you can from the Goplus.
This will give you the best chance of feeding the wire smoothly along the hose. You want the wire to go through the liner inside the hose, without the wire kinking inside.
3. Turn On The Power To The Goplus MIG 130.
4. Slowly Turn Up The Wire Feed Dial To Feed The Wire Through.
5. Once The Wire Appears At The Welding Torch Tip.
Switch off the welder.
Beware.
Be sure to switch the Goplus off. The welding wire will be live as long as there is power to the welder.
6. Slip The Contact Tip Over The Welding Wire.
And use your welding pliers to tighten back up. Then put on your nozzle.
7. Goplus Welding Wire Stickout.
You want to aim for a 3/8th of an inch of welding coming out of your welding nozzle. Trim your welding wire to this length. This is known as your welding wire stickout.
When you’re ready for some decent flux core mild steel welding wire.
Welding With The Goplus And Its Controls
The next article for the Goplus covers the controls and the settings for welding. You can head on over to take a look if you are ready for that now.
But before I leave the subject of the Goplus MIG 130 Manual I wanted to touch on the warranty.
Warranty On The Goplus MIG 130
Is short. You’ll get 90 days warranty at this end of the welder market.
The Same Goplus 130 Welder Different Manufacturers
The Goplus MIG 130 is a Chinese manufactured welder. It is imported and distributed by several companies.
The Goplus MIG 130 welder is also known as the Zeny MIG 130, the Super Deal MIG 130, the Arksen MIG 130 and the FDS MIG 130.
Did you notice the letters FDS on the front of the Goplus MIG 130?
Why am I pointing this out?
Because all these welders have the same problem, a virtually non-existent welder manual.
But on the bright side any of the YouTube videos on any of these welders will help you out.
Other Goplus MIG 130 Welder Articles On The Site
Goplus MIG 130 Welder The Metals It can Weld
Goplus MIG 130 Settings – Annoyed You Cant Find the Right ..