
You’ve loaded up your flux core welding wire into your Goplus MIG 130 and you’re ready to weld.
(If you’re not sure how to load your welding wire? Do head over to my post “Goplus MIG 130 Welder Manual, The Missing Info“)
This article takes you through what you need to know about the settings.
And controls of the Goplus MIG 130.
Goplus MIG 130 Welder Settings Control

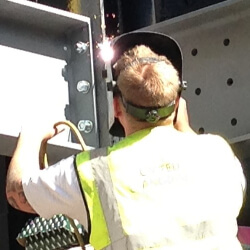
The front of the Goplus 130 MIG welder has all the controls and settings for the flux core welder.
On Of Switch
Point 5 on the picture above is the On Off switch.
The important things for you to note on powering on your Goplus are:
Beware Goplus 130 MIG Accidental Arcing
With the power switched on the Goplus MIG 130’s MIG gun, also known as the welding torch is live.
Should you place it near a metal surface you’ll get inadvertent arcing.
And be risking something called arc eye.
The arc of a welder gives off an extremely bright light. It also gives off UV rays. Your unprotected eyes can get temporary flash burn. The more this happens the greater the risk to your sight.
You’ll find it best to place the MIG gun of the Goplus on a safe surface. Or simply leave the welder switched off till you are ready to use.
The Goplus MIG 130 Is Fan Cooled
So that the fan can do its job you’ll find it best to leave a distance of 12 to 18 inches around the Goplus MIG 130. This is so that the vents can draw in the air needed unobstructed.
When The Over Temperature Light Is On
The Goplus MIG 130 has automatic thermal cut out should the flux core welder overheat.
You won’t be able to weld until the welder cools down but don’t turn off the welder. The Goplus MIG 130 needs the power on so that the internal fan can keep turning to cool the welder down. Down to a level where you can start welding again.
Voltage Output Settings On The Goplus MIG 130
The Goplus MIG 130 gives you four output voltage settings.
Voltage Output Setting Switches
Two switches control the voltage output settings.
They are shown as point 1 and point 4 on the picture above.
One of the switches has Min and Max on it. The other has 1 and 2.
The lowest possible voltage output setting is Min on the first switch and 1 on the second switch.
You move up through the voltage settings by setting Min plus 2 on the second switch.
The next highest welding output setting is Max plus 1 on the second switch.
The very highest setting is Max plus 2.
Voltage Output Versus Amp Output On The Goplus 130
Unfortunately you’ll see nothing in the manual that is going to tell you which output setting to use. And relate the output setting to the gauge of metal you plan to weld.
Experimentation is going to be your friend on this one.
The best advice is to get yourself some scrap pieces of mild steel. Select a piece the same gauge you are looking to weld and practice your settings.
You should choose higher voltage output settings for the thicker gauges of mild steel. And the lower voltage settings for the thinner gauges of steel.
The sound of the arc and the look of the weld bead itself will tell you if you have the right settings.
The right setting will get you good penetration of your metal. And good slag coverage from your flux core welding wire.
Easy slag removal is another sign that you’re in the right ball park for your weld settings.
Setting The Goplus MIG 130 Wire Feed Speed
Other than your two voltage output switches you have the wire feed speed dial. You’ll see this as point 2 on the picture above.
The wire feed speed dial runs from 1 to 10.
You’ll find the right wire feed through experimentation.
Generally, you set slower wire feed speed for the lower voltage output settings. You match this with thinner gauges of mild steel.
You use higher wire feed speeds for the highest settings. And you match this with thicker metal gauges.
Choosing Flux Core Welding Wire For The Goplus MIG 130
The Goplus takes 1 or 2 lb. size spools of flux core welding wire. These are also known as 4 inch spools.
The Goplus MIG 130 uses 0.030 or 0.035 diameter flux core wire.
Given the limited power output of this entry level flux core welder, you may find welding with 0.030 diameter flux core easier.
0.030 flux core wire takes less power from your to melt. Leaving you more power to weld with.
Just pick up some 0.030 diameter contact tips at the same time as the 0.030 flux core wire if you choose to go this way.
Airflow Around The Goplus MIG 130 Welder
Allow yourself 12 to 18 inches in front and behind the Goplus. This allows for free airflow and the cooling of your welder.
General Maintenance Of The Goplus MIG 130.
- Keep your welding nozzle and contact tips clean. Use your welding pliers to remove any spatter build up.
- Depending on how often you use the Goplus welder every 3 to 6 months open up the cabinet and brush out any debris. Brush around the fans to keep those clear of dust and dirt.
- If you are not going to be welding for a while, carefully remove your flux core welding wire. Keep it tensioned on the spool as you remove. Secure the wire by using the notch on the spool.
Place your wire in a sealed plastic bag.
Wire left exposed to the air will rust and the last thing you’ll want is rusted wire inside your gun hose and liner.
Last Words
I hope you found my article “Goplus MIG 130 Settings – Annoyed You Cant Find the Right ..” an effective guide.
Do feel free to take a look at my other resource on the site for the Goplus MIG 140 welder.
Other Resources For The Goplus MIG 130 On The Site
Goplus MIG 130 Welder The Metals It can Weld