
You’ve your Trailer Ramp Gate Plan in hand, scribbled notes all over. You may have even bought all the steel, welding wire and a tank of compressed gas for your MIG welder.
You may be just perched ready to go.
You’ll find here the 12 best hints and tips on How to build a trailer Ramp Gate before you set sail on your project.
So that, when you load up that quad. Or sit on mower of yours your trailer ramp is the best that it can be.
Before You Make Your First Weld
Particularly if you’re a beginner welder – If you’re experienced you know all this stuff already and can breeze right on by.
- Just be sure you’ve a MIG welder that is up to the job. – one that is powered by 230 volts, that way you’ll have a MIG with the amperage you need to get good weld penetration.
- That you’ve been practicing your skills.
- And you can achieve decent weld penetrations and you’re now ready for a project.
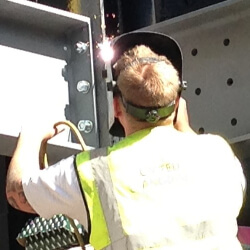
Remember; if you’re not sure of the quality of your welding be sure to get an experienced welder to check over your welds.
After all you’ll be loading your machinery and towing down the highway and the last thing you want to do is cause injury or an accident because one of your welds failed.

Don’t Have Any Plans Yet?
This is the second part of a two part article series. The plans this article is based on are from Matt of Red Wing Steel Works an AWS certified welder and fabricator.
Matt generously provides his Utility Trailer build plans for free and they can be accessed here
If you haven’t got your trailer ramp gate plans together and would like some help then do head on over to the “Utility Trailer Ramp Gate Plan” article and take a look at the images, guidance and videos there.
As you read on down this article think to your own particular circumstances, adjust as needed and have at the back of your mind the intention to make your ramp as strong as possible.
Something your proud of, something you’d love to show off to your friends
Now you’ve your Trailer Ramp Gate Plans in Hand
How to Build?
How To Build A Trailer Ramp Gate – 12 Best TIPS To Keep In Mind
TIP 1. It’s Key To Cut Your Parts Accurately
Lengths and angles. When all your parts are cut to the right dimensions, putting it all together becomes a breeze.
TIP 2. It’s Essential To Square Up The Entire Ramp
Matt has an eight minute video that discusses how he goes about squaring up a piece this large. Although the video actually shows him squaring up a trailer frame the principal is the same for the build of a trailer ramp gate.

A vice grip in each corner is crucial to hold your frame in place.
Yes, I agree with Matt in that you could use a framing square but with a piece this large it is just not going to be accurate enough. I would really recommend that this is the best method.

Matt accurately measures one diagonal of the trailer frame.
And he notes the measurements.
He then accurately measures the second diagonal of the trailer frame.
And because he has the corners held with vice grips he can easily adjust the frame until both diagonals measure the same.

If you follow this advice and do exactly this you’ll know that the trailer ramp gate frame is square.
This is not the place to rush and be in a hurry.
Having gone to all this trouble when you weld up the piece and it is not square you’re going to be in a world of trouble later;
- when putting in the cross members,
- not to mention when you’re actually using the ramp gate,
- the frame not being square will mess you up when you’re putting up and down your trailer ramp gate,
- not to mention the bounce you’ll get going up the ramp when you’re putting your equipment onto the trailer.
Take your time and measure and measure again so it’s just right.
Only once the frame is square is a single tack weld made into each corner, either on the inside or outside of the frame corner. Tack welding is used to temporarily hold the trailer gate frame square while you put in the cross members
But not hold it so rigid so that when you put in the cross members.
The frame won’t be held too rigid and you’ll have a little movement if you need it.
YouTube Video One
Here is the link to the full eight minute YouTube video where Matt fully explains how to go about squaring up and tack welding correctly. Remember in this video he is working on the Trailer floor itself however the principals are just as applicable to the build of your trailer ramp gate.
How to Build a Utility Trailer Part 2 Cutting, Squaring and Tack Welding
Video Credit: redwingsteelworks
If you’ve the time it is well worth watching.
TIP 3. Tack Weld First
Tack weld everything first. You can get pretty far with your build of the trailer ramp gate by tack welding.
Tack weld first so that;
You can see the overall shape as your trailer ramp comes together.
You can make any adjustments you need to before everything is fully welded. When you weld fully, any mistakes mean that you have a full weld to deal with before you can fix the problem.
TIP 4. Placing The Cross Members
Tip, where you place the cross members are also important, especially when you’re planning on loading up your ramp heavy machinery or plant.
Plan to roll up your machinery centered over your ramp for maximum stability when loading.
Measure along the front of your mower or other plant between the front tires.
Centre the measurement over your ramp.
That way you find out where the wheels of your machinery would roll up.
Place one or two cross members where the wheels would roll. This maximizes the strength of your trailer ramp gate.
Then work out where to place the remaining cross members evenly to support the rest of your trailer ramp.
The plan allows for two cross members but you may need three or four to support your trailer ramp gate well.
TIP 5. Adding The Cross Members To Your Trailer Ramp Gate
When adding the cross members onto your trailer ramp gate the tip is, put the angle iron flat side onto the frame as shown in the picture below. Then tack weld the cross member.

That way you’ve the maximum surface area for when you come to fully weld on your ramp flooring or deck.
TIP 6. Putting The Utility Trailer Ramp Gate Hinges Together
Assuming you’re making your own hinges and not using hinges you’ve purchased.
Following cutting your piping to length – de burr the ends so they are smooth. This will make it easier for the pieces of your hinge to glide past each other and work smoothly first time.
To construct your hinge
- Put the steel rod through the middle of the four inch section of the schedule 40 piping. The four inch piping forms the center of the hinge
- Put the two, two inch piping sections on the steel rod. Slide on the rod either side of the center section. They form the outer sections of the hinge.
This picture shows the hinge being put together.

The steel rod that forms the center of your hinge is welded at its end to the end of the two inch outer piping sections.

The hinge works by the end pieces of the pipe staying fixed in place to the rod and the piping and rod form one piece that moves together.
center pipe piece moves independently.
The extra half inch of space on the solid steel rod allows the free movement.
And acts to help prevent mud or dirt from the road from causing your hinge to seize up.
The center piece is the part welded to your ramp and moves as your ramp goes up and down.
TIP 7. Placing Your Utility Trailer Ramp Gate Hinges
This tip is valid whether you’re making your own hinges or using bought trailer hinges designed to be welded to weld on.
The best place to place your hinges particularly when you’re moving heavy equipment up the ramp would be where the wheels of the equipment would run.
When you’ve followed the advice here. And placed the cross members where they need to be to support your heavy plant (TIP 4 above). Then simply line your hinges up with the wheel supporting cross members.
It will be the place of maximum strength to roll your machinery up and over.
TIP 8. Welding The Hinge To The Ramp And Trailer
This tip is for the constructed hinges as per the Red Wing Steels plan.
Then when you come to weld the trailer ramp hinge in place you weld the fixed end pieces along the top and along the underside to your trailer.
Only the end pieces of the hinges are welded to the trailer.
I have marked the section in yellow on the picture below so you’re clear on what needs to be welded. Take care not to over weld and weld the center piece accidentally.
Or your hinge won’t work.

The center piece is then welded to the gate ramp.
But for now tack weld, see how it all works and moves.
The full welding comes later.
When you’re welding shop bought trailer hinges you’ll need to follow the instructions provided with your hinges on where their welds need to be. I’d still advise you to tack weld first, see how it all moves and if all is ok then you can go for the full weld.
TIP 9. Using 2 x 4 Wood Flooring For Your Ramp
Choosing to use 2 x 4 wood for the floor of your ramp would mean that the constructed trailer hinge detailed here wouldn’t necessarily work for your trailer ramp gate.
The wood could get in the way of the ramp closing with this style of hinge.
Double check where your trailer floor ends to see if you need a different type of hinge. One with more clearance.
Remember, your ramp could be quite heavy with its wooden floor.
An Alternative Trailer Gate Hinge Idea
Weld two to four inch metal extensions to both sides of the end of your trailer. Drill a hole through the extension and the metal frame of your ramp gate and then use a metal rod to act as a basic hinge.
Secure both ends of the metal rod so it doesn’t come loose.
Make the metal extension sturdy with 2 x 2 x 1/8 th angle iron or 2 x 3 x 3/18 ths square tubing.
And use half inch solid rod so that it can adequately carry the weight of your gate ramp.
This trailer gate hinge idea is not the ideal mechanism as the weight support is all at the side. But when the machinery you’re rolling up the ramp isn’t too heavy you should be fine.
Otherwise take a look for suitable specialist trailer hinges that would work for your weight of ramp and your trailer.
TIP 10. Using Sheet Metal Flooring For Your Ramp
Sheet metal is a potentially slippery surface material for your trailer ramp floor but when you do decide to go with sheet metal you can choose 14, 12 or 10 gauge sheet metal depending on how firm you want the flooring to be.
Weld the floor to the frame securely around the sides both on the top and to the under side of the frame.
Matt suggests a 2 inch length of weld at 12 inch intervals as a minimum to weld the floor to the frame.

Also weld the floor underneath to the cross members, both sides to prevent your weld rolling and failing.

I’ve tried to illustrate in the above picture what I mean by flooring welding both sides of the cross members on the underside.
3 inch welds on either side of the cross members as a minimum.
Generally, weld at sufficient intervals to secure the floor to the frame and the cross members.
TIP 11. Using Regular Expanded Metal Flooring For Your Ramp
Regular Expanded Metal flooring (not the flattened kind) is a good choice for trailer ramp flooring. The raised surface of the Regular Expanded Metal providing a grippy surface.

As mentioned in the Utility Trailer Ramp Gate Plans article on this site,
arrange to have your Regular Expanded Metal flooring cut at the diamond intersections. That way when you’re welding your Regular Expanded Iron sheeting to the frame you’ve the maximum surface area available to weld.
Regular Expanded Metal has sharp edges and has a habit of cutting up hands using the trailer ramp when the sharp edges are left on and uncovered.
So when you’ve the time and the patience it is best to weld at every intersection to the frame and have those sharp edges covered with a weld – it also strengthens the flooring.
Also weld as often as you’ve the patience, to the cross members.
Either side on the underside of your trailer ramp gate
This will provide the maximum rigidity for your floor and prevent sagging over time of the Regular Expanded Metal sheet.
TIP 12. What If I’m Making A Folded Ramp Gate?
You’ll be making your ramp in two sections. Front and back.
- Square up correctly each ramp section. This is going to be crucial for your folding ramp to work.
- And tack weld each square section.
- You’ll need an additional set of hinges.
- A set of hinges that work in only one direction and sit between the front rectangular section of the frame and the back rectangular section. So when your trailer ramp gate is folded down the hinges come to a stop with the ramp flat straight – important!
- The hinges positioned to match the cross members that support the wheels of the machinery you plan to load.
- The middle hinges fixed so they fold in the opposite direction as the hinges attaching the ramp to the end of the trailer – important!
- That’s so that you can fold correctly.
You’ll need to consider how you secure your ramp in its folded up position by increasing the length of the extension you add to your trailer side arms for the ramp gate. But you can use a latch pin to secure your ramp in place or a chain arrangement.
Tack weld everything up so you see how it all works for you and your trailer before putting in the final welds.
YouTube Video Two
Here is the link to Matt’s eight minute video covering many of the points I’ve detailed above. Note that, he is actually constructing a trailer gate rather than a ramp gate, however most of the principals he goes over are still completely valid.
Mounting Jack, Flooring, Sides and Completion
Video Credit: redwingsteelworks
Take a look at the video if you’ve the time. It’ll really help.
TIP 13 Final Welds
Once you’re happy with the construction of your ramp and how the trailer ramp gate works tack welded up, you’re ready to do the full welds.
- Weld everything up generously.
- Weld fully all corners.
- Weld fully both sides of all the cross members where they meet the frame.
- Weld both sides (top and bottom) of the hinges, where they meet the metal frames.
- Weld both sides (top and bottom) of the center of the hinges where the hinge meets the ramp
When you’re making your own hinges, take care on both the hinges to only fully weld where you need to so that your hinge moves freely. (take a look at the picture in the hinges section above.
Putting on your metal flooring use the welding suggestions in points 9, 10 and 11 above as a minimum. The more welding you do the sturdier and safer your ramp will be.
To Close
I wish you enjoyment in your project “How to Build a Trailer Ramp Gate”. May it be something that is not only functional, works great and looks good – it is something you’re proud of.
Remember that
What ever you build be sure it’s safe. When you’re unsure get someone more experienced to check your welds.